Introduction

The real estate industry is highly competitive, with over 360,000 brokerages and 1.5 million realtors in the U.S. To run a successful business and make a profit, your real estate transactions need to run smoothly.
However, listing and selling a property is hard work and can become complex for both agents and brokers.
In this listing agent checklist, we explain all the steps you must take to list and sell a property. You can also check out our buyer's template checklist blog post to learn about the other side of transactions.
1. Prospective listing
This is where you sell your capabilities and encourage sellers to choose to work with you during a listing appointment.
Prepare a killer listing presentation
A good listing presentation tells clients why they should choose to list their home with you and not sell it themselves or go to another agent.
Before creating the presentation, you should perform a comparative market analysis, giving you valuable insights.
How much have similar homes sold for in the area? Is the area attractive? Does it have good amenities? Factors like this will help you value their home.
Your listing presentation should include key information like:
- Your proposed listing price for the home.
- How you calculated that price.
- Suggested improvements that would help increase the property's value.
- Staging proposals. For example, will you hold an open house with food? Or will viewers need to book time slots?
- Highlight your track record, including some statistics.
- Provide testimonials from similar clients for whom you've sold homes.
Deliver the listing presentation
A listing presentation is your chance to sell yourself, but you should avoid making it a one-hour sales pitch. Instead, use it to showcase your expertise by talking your client through the sales process, listening to their problems and questions, and providing solutions.
Send a follow-up or thank you email to the seller
The chances are that your prospective client is talking to many real estate agents. You need to make sure you stand out and that they remember you.
One way to do this is by following up the listing presentation with a friendly, personalized email. You can speed up this process by:
- Setting up a thank you email template in Paperless Pipeline.
- Automatically send a thank you email for each new transaction.
You could send a short, 30-second personalized video where you mention them by name, welcome them, thank them for working with you, and tell them how much you look forward to working with them.
Additionally, include a list of valuable resources for selling their home and reasons to choose you, including:
- Your step-by-step new listing marketing checklist.
- A map showing properties recently sold in the area, highlighting the ones you sold.
- A guide to selling your home.
- Your successful sales statistics, client testimonials, and reviews.
- A brochure introducing your team.
2. Pre-Listing
There's a ton of admin to perform before you can begin selling someone's home. The next section of our comprehensive checklist helps you navigate this.
Send the seller the listing agreement to be signed
A listing agreement is a contract between you and a property owner. It gives you the authority to act on their behalf to sell their home.
There are three main types of listing agreements:
- Exclusive right to sell listing: No real estate professional other than you can sell the property for the duration of the contract.
- Exclusive agency listing: No one other than the seller can sell the property for the duration of the contract.
- Open listing: The seller can work with multiple local agents, and whoever finds a buyer earns the commission.
Add the seller information to Paperless Pipeline
Now that you've signed an agreement with the seller, it's time to set them up on your transaction management system and record their details.
Go into your transaction management platform and create a new transaction. For Paperless Pipeline, you do this by clicking "Add Transaction" in the upper right corner of any page.
There are several different fields to complete. Some of these will be required, but others can be left blank until you have the required information.
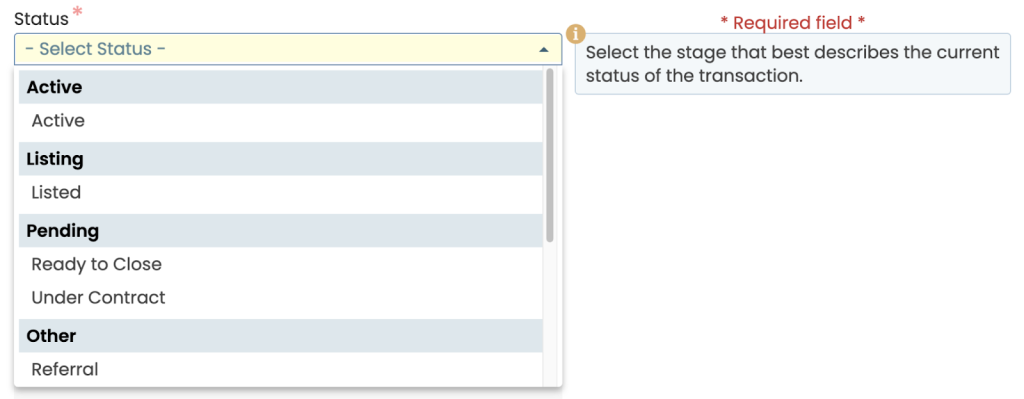
Here are some that are essential at this stage:
Under the "Status" drop-down menu, select "Active".
Add the seller's name and the lead source (if relevant).

Click "add seller as contact" and add their details.
Schedule professional photography and videography
Professional photos and videos are crucial for generating interest in a property. You can also create 3D tours and aerial drone footage.
Obtain the MLS data input information
Once you have the photos and videos, it's time to add your client's property to your MLS.
Here are some tips for this stage:
- Keep the property description short and succinct.
- Be accurate about property details.
- Highlight unique features to attract potential buyers.
- Talk about local attractions and amenities.
- Give a clear and firm deadline for offers.
- Don't use acronyms or abbreviations.
- Highlight any upgrades.
- Add any video tour or virtual tour links.
Obtain the sellers' disclosures
The law requires sellers to disclose anything that may negatively impact a property's value to potential buyers. The rules for this differ from state to state, but a typical list might include:
- Recent deaths that have occurred in the home.
- Nuisances in the local area.
- Hazards like asbestos, radon gas, or lead paint.
- Homeowner's association information.
- Recent repairs.
- Water damage.
- Whether the home is in a historic district or similar special designation.
Send the seller the estimated net and cost expectations
It's important that your client understands how much of the money their home sells for will go to them and what it will be used for.
As you know your commission structure, fees, and the estimated value of their home, you should be able to give them a fairly accurate projection.
Change the status in Paperless Pipeline to "Active Listing"
Moving the deal to the "Active Listing" category in your transaction management tool is critical now that the property has been listed.
Ensure everyone in your real estate business can see the property being marketed
This is easy in Paperless Pipeline: Open the transaction, scroll down to the drop-down menu labeled "status," and choose "listed."
3. Active Listing

Set the listing to Active in your MLS
Doing this ensures that other agents and prospective buyers can find and view it. It also makes it viewable on third-party websites with access to your MLS.
Add the offer instructions
Include clear instructions on how to submit an offer in your listing description, including:
- The address of the property.
- The names of the potential buyers or anyone who will be on the title.
- How much they want to offer.
- A list of contingencies.
- A list of concessions.
- A list of items to be included in the sale.
- The earnest money deposit amount.
- Their mortgage loan approval letter.
- Their expected closing date.
- The date they want to move in.
- A deadline for your clients to respond to their offer.
Upload property disclosures
Add the list of property disclosures to the MLS for all potential buyers to see for complete transparency.
Install a sign and lockbox on the property
Get a "For Sale" sign up to generate interest from passers-by and help those looking to drive or walk by the property.
Add a lockbox with a key so buyer's agents can access the property once you have booked viewings while your client is out to show prospective buyers around.
Schedule an open house
Arrange a date for your client's open house. You should also:
- Ensure the house is ready and schedule any cleaning.
- Arrange a time that is convenient for potential buyers.
- Set a clear two-hour window.
- Ensure your client has insurance to cover hosting the event.
- Ask a couple of colleagues to attend the open house to ensure it runs smoothly.
- Print marketing materials and contact forms that viewers can pick up at the open house.
- Add the open house date to your MLS listing and marketing.
4. Pending

Once your buyer has received all their offers and negotiations are complete, it's time to begin the closing process.
Change the status in MLS to Pending
Go to your MLS and change the listing's status from active to pending. This will ensure that no one else tries to view the property or submit an offer.
Change the status in Paperless Pipeline to Pending
Go to Paperless Pipeline, open the transaction, and scroll down to the drop-down menu labeled "status." This time, choose "pending."
Retrieve any missing documents or signatures
Ensure that all the documentation you have received from the buyer and seller is complete and there are no missing signatures.
Complete and send the title order
You or the buyer's mortgage lender must instruct a title company to perform a title search. This ensures your buyer has the right to sell the property. The title company often holds the earnest money deposit as well.
Confirm earnest money or collect the receipt
Contact the title company and ask if the earnest money has been deposited. If it has, request a receipt to send to the buyer and keep for your records.
Confirm that the lender has ordered the appraisal
Your buyer needs to ask their lender to order an appraisal. This is when an inspector visits the property to ensure it is worth what the buyer pays for it. It does not count as a home inspection.
Verify that all the title work is complete
Check that you have received the title report and everything is in order. If there are any problems with the title, inform your client immediately.
Your client or the buyer (or both) may have to hire an attorney to sort the issue out. A title issue could cause a buyer to back out of the deal.
Confirm repair negotiations
Once the inspections and title search have been completed, the buyer will study the reports and decide whether the property is still worth their original offer. If they think it isn't, they will issue a new offer, a list of requested repairs, or both.
Your client can accept or reject the buyer's requests or issue a counteroffer. The buyer and seller can continue issuing counteroffers indefinitely until one is accepted or rejected.
Verify that the appraisal has been passed
It's essential to check that the lender is still happy to fund the property before proceeding beyond this point. If they aren't, your client may have to consider accepting a lower offer on the property.
Confirm the buyer's lender is clear to close
Once the mortgage lender is satisfied that they have everything they need to release the funds, it will issue a "clear to close".
This triggers the final stages of a deal. After this, a loan officer will schedule a time and date for the closing meeting and assemble the final documents.
Confirm the closing time with the title company
Ensure your client knows when and where the closing meeting will occur. You should also tell them what to expect and offer to attend the meeting with them to support and celebrate the big day.
Send a CDA to the title company or attorney
You're responsible for paying anyone who worked for your client. This includes any inspectors, attorneys, and the title company.
Here's how to do this using Paperless Pipeline:
- Open the transaction and click "note/email".
- Enter the email address of the contact you want to pay.
- Fill out the subject and body of the email. For more information on what to include, check out our article on how to create a real estate CDA.
- Scroll down to the docs section and select the CDA.
- Click "send email".

Ensure that no additional amendments are required
Real estate deals can take a long time, and many things can change during the listing process. This may mean that changes or modifications must be made to the purchase agreement or contract.
Some examples include:
Price amendment
The buyer and seller may agree to amend the purchase price if negotiations result in a different agreed-upon amount. This might happen because:
- An inspection revealed that repairs need to be made to the property.
- The appraisal came in lower than expected.
Closing date amendment
Due to unforeseen circumstances, parties may need to change the originally agreed-upon closing date. For example:
- Delays in financing approval.
- Title issues.
- Personal scheduling conflicts.
Inspection amendment
If a home inspection uncovers issues that were not previously disclosed, the parties may negotiate amendments to address repairs, credits, or concessions.
Confirm removal of contingencies
Verify that all contingencies, such as inspection, appraisal, financing, and title review, have been formally removed in writing by the buyer's agent. Ensure all relevant documents are signed and uploaded to your transaction file.
Receive or distribute the closing disclosure and settlement statement
These are two documents.
- The settlement statement summarizes the financial details of the transaction, including the names of all parties involved, contingencies, and deadlines.
- The closing disclosure provides financial details about your client's mortgage loan. It covers things like terms, monthly payments, and fees.
You should check that both documents are accurate and send them to your clients for signature.
5. Post Close Checklist

Change the status in MLS to "Sold"
Open the contract, click the status drop-down menu, and choose "sold".
Submit the final documents to brokerage compliance
All documents required by your broker must be:
- Signed.
- Fully executed.
- Uploaded to your document management system.
This step is critical for brokerage compliance. Also, some brokers won't issue an agent's CDA if they don't do this.
Change the status in Paperless Pipeline to "Closed"
The final stage is to close off the transaction in Paperless Pipeline. As before, open the contract, click the status drop-down menu, and choose "Closed". Paperless Pipeline will store the transaction details for up to 10 years.
Make Every Deal Run Smoothly with Paperless Pipeline

The listing agent checklist in this article is a solid spreadsheet-based system. But because it lives in a spreadsheet, there's no built-in way to ensure deadlines are met or documents are actually submitted on time.
That leaves room for missed steps, which can lead to frustrated clients, inefficiencies at the brokerage, and even delayed or derailed deals.
That's where a transaction management system like Paperless Pipeline comes in. Instead of relying on memory or manual follow-ups, Paperless Pipeline lets you create customized, automated checklists with built-in reminders—so agents and admins stay on track without the constant oversight.
With Paperless Pipeline, you can ensure critical deadlines are met and easily track every piece of listing paperwork in one place.
See how automated checklists can simplify your listing process— start a free trial today.
Related: the transaction coordinator checklist and our free transaction tracker spreadsheet.